Showing posts with label cute. Show all posts

Monday, 16 February 2015

Crochet Rock covers- a super quick cute crochet project.

Coral pebbles free crochet pattern- these pebbles are perfect weights for the tablecloth and napkins - they make pretty paperweights on my desk too!Whilst meandering around Pinterest I came upon this cute crochet project from onechurchillsgreen.typepad.com, and it made me think about a rock that we have had on display in our living room for a number of years.
This is the rock in question:
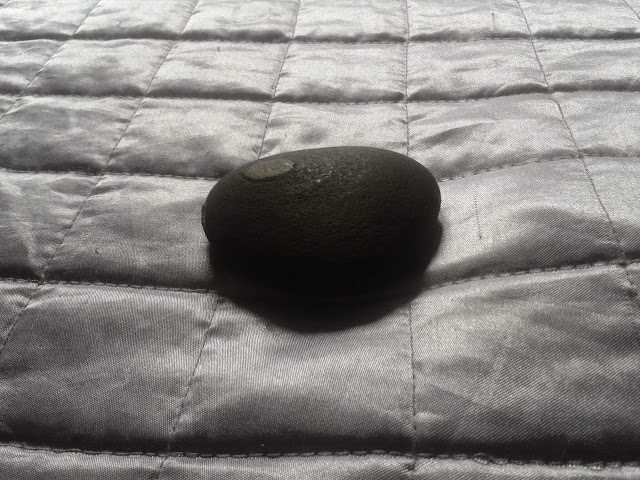
Doesn't look very interesting right? But what makes our little rock different is that my Husband and I found it whilst walking on a beach many moons ago (11-12 years ago? A long time anyway.. :) ) And what made this rather boring looking rock special enough to pick up and keep for all these years is that it is in fact two rocks.. well, two halves of one rock that still fit together perfectly, and the romantics that we are have kept it, because we are two halves of one rock that fit together perfectly. 


Ok, enough of that... bleurgh :-p

So with the post from onechurchillsgreen as inspiration I grabbed a hook, a couple of oddments of dk yarn and whipped up a couple of crochet covers. 


I didn't use a pattern, I just went with the flow, making chains and doing a variety of single and double crochet stitches until I came up with a lacy pattern that pleased me. I happy with the two slightly different patterns, one like a sea urchin and one with a flowery pattern.


The underside of the rocks have a mesh pattern on them to hold it in place, again I just did a variety of chain and single crochet stitches until it held securely in place and then fastened off.


And here are my rocks on display on my fireplace.


A little more interesting to look at than before and it probably took me a total of 15 minutes to whip up.

Have you made any quick and satisfying projects?

L x


Monday, 3 March 2014

A day in the workshop with Lucy

It's been two weeks since I last posted and really it's because the time has just flown by! I've been back at work after a period of illness and to add to the fun I've had the most awful cold that has just dragged on and on for the last two weeks.
Today is about a lovely workshop I attended at the beginning of February with the lovely Lucy from the Attic24 blog.

It was the first workshop Lucy has done, and also the first crochet workshop I have attended. It was a nice small group of 8 ladies, some travelling from as far away as Scotland and Wales. I had a lot shorter journey from Leeds to Skipton! Despite the weather being grey, windy and awfully wet we all had a good time (at least I did, I'm sure all the other's did too!) and were suprisingly quiet as we all concentrated so hard on the pattern. In fact, now I think about it, the drenching I received on the walk back to the train station and the damp cold journey home might have had a hand in my stinking cold!
The project we were working on was the wonderfully cute Bower Bird. I know Lucy is working on a tutorial for the Bower Bird and I'm sure she'll share it on the blog as soon as she can. Here is her Post including her workshop- you can just see my hands on the left of the picture and my crochet hook roll!
We all finished our birds and had a little bag of goodies to take home to finish our bower including a nice little bag of lavender so we could make our next little birdy into a lavender bird. I haven't made another bird yet but that lavender sure smells amazing! Here are our little birdies all lined up.

Mine is the teeny tiny bird! I was the slowest that day because I was concentrating so hard on being perfect and being absolutely 100% perfect on my count and I crocheted so tight Birdy is half the size of everyone elses! Never mind- he is small but perfectly formed!

Here is Lucy taking a pic of our birdies and one of me having a geeky 'look-I'm-with-Lucy-and-she's -faaamous!' moment.
I must say I found Lucy to be lovely, friendly and welcoming (not that I expected otherwise) and the cafe that her workshop is above does the most aaaammmaaaazing Rocky Road. Yum Yum. If you are ever in Skipton check out Cooper's Cafe Bar- you walk past it on the way to the town centre from the train station.
I haven't, as yet, finished my bower. I'm not 100% sure I don't want to make another bird in brighter colours. I'm happy with my purple and green bird, but I'm  not sure if he would look a little lost in a colourful bower. If I do, I'll turn Birdy into a little individual hanging ornament.
Today we had a hint of sunshine so I literally ran out into the garden a took a few pics of Birdy perching on my climbing rose. 
So here he is: 


Hope you all have a lovely week.

L x 

Monday, 10 February 2014

Yarn wrapped tealight holders


Today I thought I would share with you a way I have been upcycling/recycling some glass candle holders wich have run out into nice colourful yarny tealight holders. They are super simple and quick, you may well get your fingers a bit sticky but that's really the extent of the hardship involved!

First find a jar you want to wrap with yarn. This is a Yankee Candle which has burned all the way down to the end leavig only it's waxy residue.


Then you need to clean out your empty jar:


You will need some PVA glue or Mod Podge or similar, a brush and some left over yarn. I used a self striping DK weight yarn and PVA glue.


Paint some glue on your glass jar. You need enough to stick the yarn to the glass and to the yarn above it so it sits tightly together, but not so much that it's all squidgy and oozing out between the yarn and running down the sides. I find it best to paint a bit of glue on at a time, wrap the yarn around and keep 'nudging' the yarn up so it sitting all snug together and not leaving lots of gaps.


Keep wrapping and nudging all the way down to the end. Snip the end of the yarn. Make sure your yarn end is glued down securely and leave to dry. Overnight is best.


And that's it all finished. Isn't that easy? The jars I had have lids so, to give them a little face lift to match their new yarny exteriors, I crocheted little motifs in the same yarn. I used the free patterns for 'Teeny Tiny Flowers' and 'Teeny Tiny Hearts' from Attic24. They were just the right size to fit on the glass lids.


A good blob of glue and voila!


When everything is dry add some tealights and light 'em up! I like the way the candles glow through the colours of the yarn.


As you can see from my pic you don't have to stop at jars for tealights. I used the same yarn to wrap an empty, cleaned out beer bottle and now it can be used for flowers.

What will you be wrapping?

L x